
How do I make Windows 11 portable?
“Recently, my company upgraded all computers to the latest Windows 10 edition. So, now, I handle all my work on this operating system. However, I’m not the sort of man who’s willing to work late, and sometimes, I’d rather try finishing the rest at home. My home PC is running on Windows 7 and I don’t plan on making any changes as some of my personal apps are only compatible with Windows 7. Is there any way to create and run portable Windows 10 on my own PC only when I need it?”
What’s Microsoft’s Windows To Go and why do we need it?
Windows To Go is a Microsoft developed feature in Windows 11 Enterprise and Windows 10 Education that enables the creation of a Windows To Go workspace that can be booted from a USB flash drive. To be brief, this feature allows you to create a USB drive with a portable Windows 10 operating system and once you insert it into a non-Windows 10 PC, you can boot into Windows 10 from the USB drive. After disconnecting it from the PC, then, everything goes back to the previous OS environment. However, here comes a sad news. If you’ve recently been to Microsoft.com, you’ll know Windows To Go is removed in Windows 10, version 2004 and later operating systems.
Alternative – easier way to create a Windows 11 To Go USB drive
I was quite struck too when I first heard of the news. Then, I tried to find some other alternative ways to create portable Windows 11 on Google without the help of Microsoft. After a long search, finally, all my efforts paid off. A third-party Windows To Go creator – AOMEI Partition Assistant– comes into my sight. It’s essentially a partition manager that helps users manage hard disks and partitions for new PCs but it also comes with a bunch of practical features and Windows 11/10 To Go is one of them.
Free download the world’s best Windows To Go Creator to make Windows 11 or Windows 10 portable for your daily work!
5 Steps to create a Windows 11/10 To Go USB!
In the past, you must endure a long procedure to create a Windows To Go USB in the traditional way. But after this AOMEI product came out, things changed. Now, try doing it on your own by following the easy-to-understand tutorial below.
- You’re recommended to use a 3.0 USB stick for Windows 11 and Windows 10 To Go as it provides higher speed and better stability.
- As Windows 7 doesn’t have built-in USB 3.0 support, so Windows 7 has to be booted from a USB 2.0 port.
Step 1. Install and launch AOMEI Partition Assistant Standard, insert the USB into your Windows 11/10 PC and make sure it’s recognized.
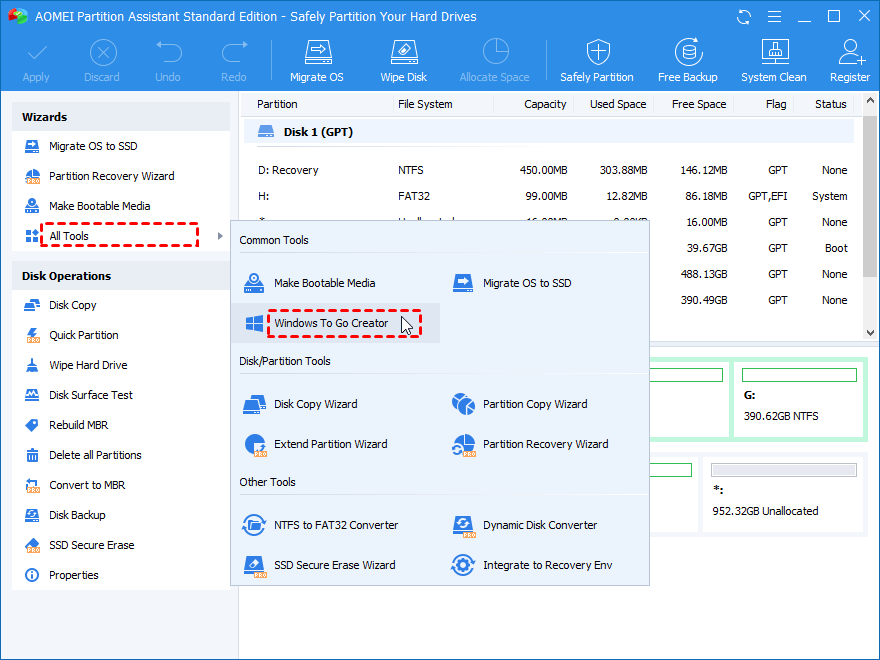
Step 2. On the home-interface, follow “All Tools” > “Windows To Go Creator” as the screenshot displays.
Step 3. In the popup window, tick the option “Create Windows ToGo for personal computer”. Hit “Next”.
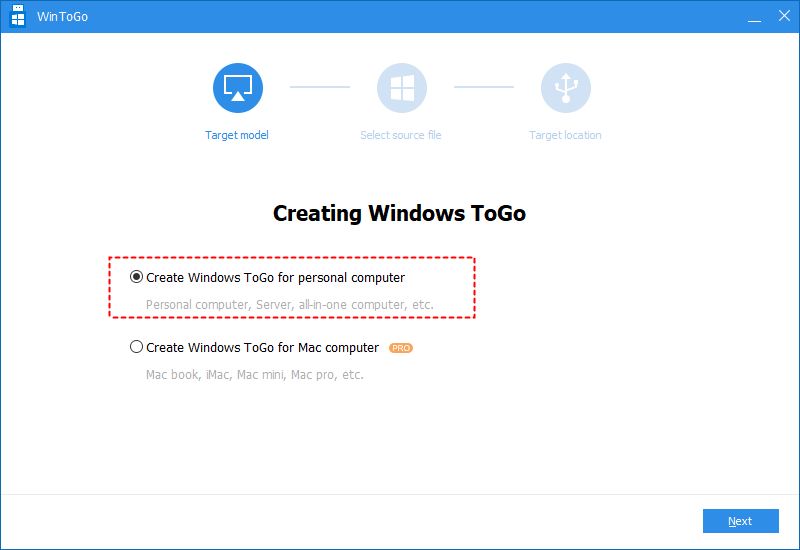
If you try the other option “Create Windows ToGo for Mac computer”, please upgrade to the Pro edition.
Step 4. Select “Create Windows ToGo with system disc/ISO”, import the ISO file that’s previously downloaded and hit “Next”.
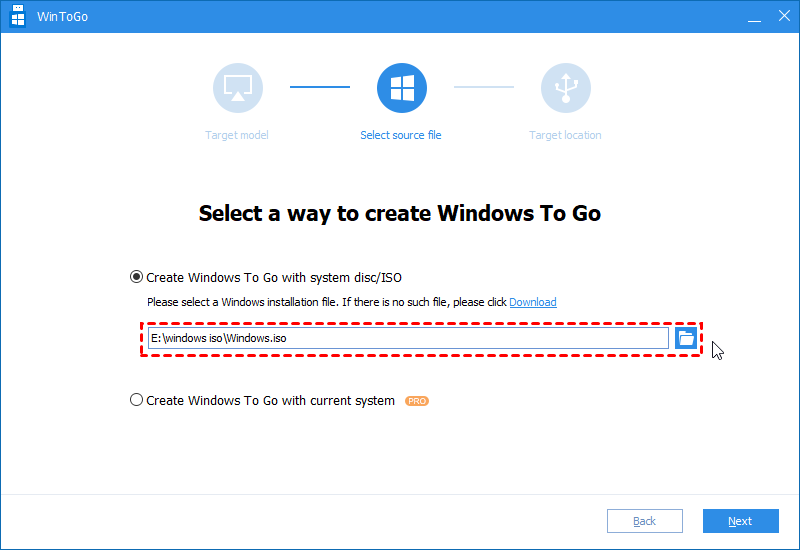
If you want to try the second option “Create Windows To Go with current system”, you should still upgrade to the Pro edition.
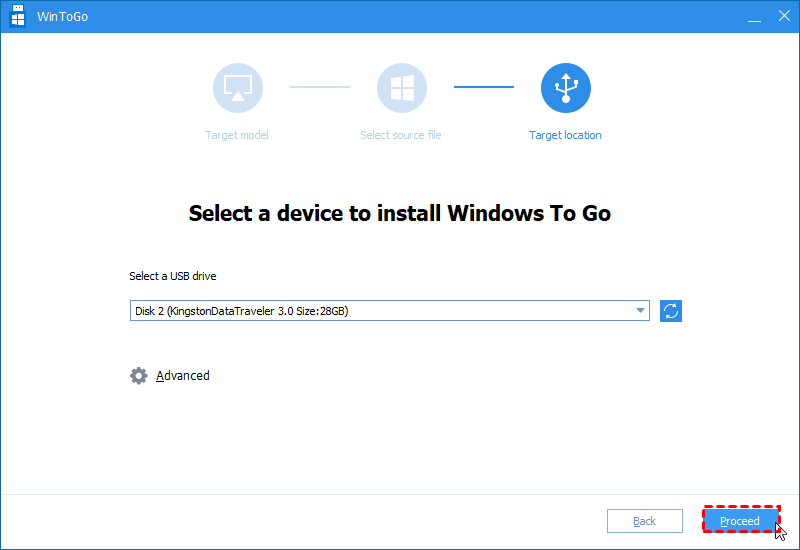
Step 5. Select your USB device to install the portable Window 11/10. Click on the refresh button if it’s not recognized. Then, click on “Proceed” to start the Windows 11/10 To Go USB creation.
Brief instruction: create portable Win 10 Enterprise/Education To Go
Although Microsoft has removed Windows To Go from the latest versions of Windows, you can still create portable Windows 10 Enterprise/Education in the old way. Compared with AOMEI Partition Assistant, it can be much more difficult. But if you insist on using the Microsoft way, go ahead and follow the detailed instruction below and I’ll try to make it as explicit as possible.
1. Download the Windows 10 ISO file from https://www.microsoft.com/en-au/software-download/windows10 and insert your USB drive into the Windows 10 computer.
2. Open the control panel and search for “Windows To Go”.
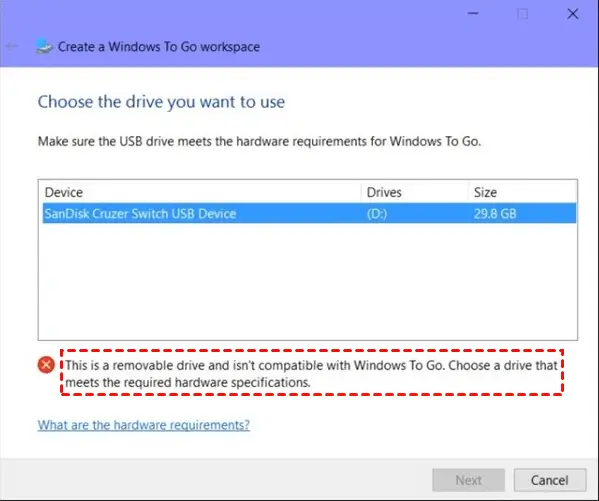
3. Now, you can select the USB drive where you want to burn the ISO. Click on “Next” to proceed.
The “Next” button will be greyed out if the USB drive is not certified.
4. Hit “Add search location” to let the system look for the Win 10 ISO file and when it’s completed, choose the mounted one.

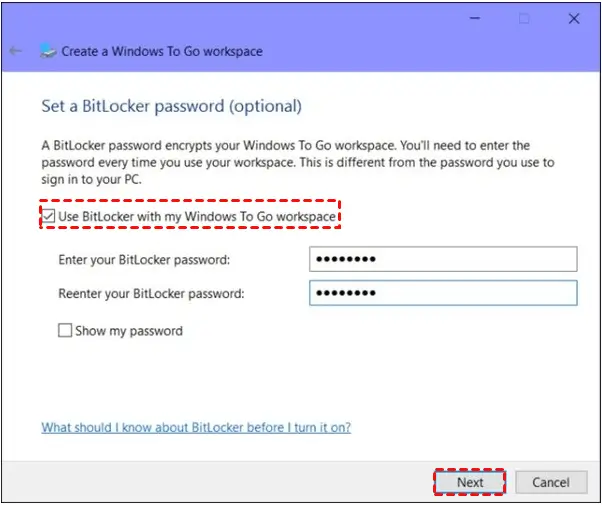
5. For safety’s sake, preset a Bitlocker passcode for Windows To Go workspace encryption.
The ISO burning process will begin right now. Wait a short while before it’s finished.
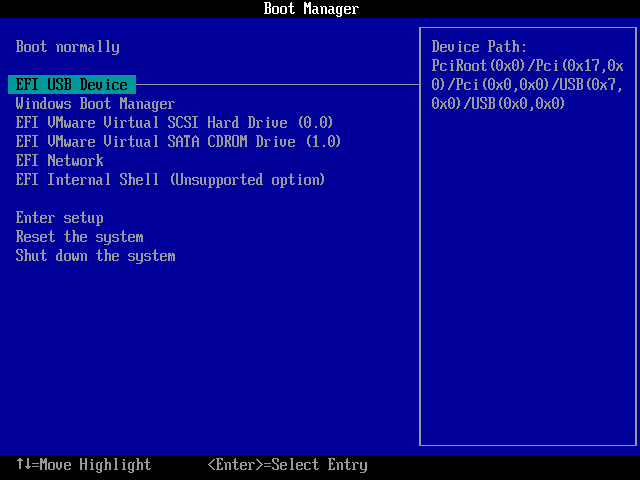
Now, it’s time to try the portable Windows 11/10 on the target PC. But first, you should set the Windows To Go USB as the first boot device in BIOS. Then, you can boot from it into your desired Windows environment.
Conclusion
Many people feel exhausted as Microsoft removed Windows 11/10 To Go from the latest OSes and are wondering whether there’s an alternative. Luckily, a much easier third-party Windows To Go Creator – AOMEI Partition Assistant – comes and is set apart from other counterparts with its practical features besides WTG, such as app mover, SSD 4K alignment, and OS to SSD migration.
More readings
5 Ways to Download YouTube Age-Restricted Videos in 2022
6 Best Free Video Editors 2022
How to start a video game live steaming